TA 2021 Year in Review
2021 has been a tremendous year of opportunities and growth for our Transported Audio team. Instead of listing every project and accomplishment, here are a few highlights:
- Augustus was a 2021 Academy Award Qualifying Short Film
- Wild Indian premiered at the 2021 Sundance Film Festival
- Anchor Point won the award for Best Documentary at Cinequest
- Brian Wilson: Long Promised Road premiered at the 2021 Tribeca Film Festival
- The Me You Can’t See released on Apple TV+
- For Rosa and The Last Cruise released on HBO Max
- Cupid for Christmas released on Hulu
- Rock the Block and Tiny Food Fight released on Discovery+
- The Housewives of the North Pole released on Peacock
- Behind the Scenes videos for The Boys, Panic, Making the Cut, Hannah and The Wheel of Time released on Amazon Prime Video
- Our team was interviewed at the 2021 Fall USC Career Fair
- Brian Wilson: Long Promised Road has been shortlisted for a 2022 Academy Award nomination
We also fully moved into our new studio in Burbank, and all of our rooms are fully operational! Our new dedicated ADR Stage, Paper Street, is now SAG approved.
Every single one of our successes this year is a tribute to the trust and creativity you have brought to our studio. We always aim to be your storytelling partners at every turn, no matter how crazy the circumstances might be for finishing your project. Nothing makes us happier than to see these projects flourish.
Thank you for making this such a special year for all of us. Our entire TA team wishes you the Happiest of Holidays and a great year ahead!
Sincerely,
Eric Marks
MPSE Content for your Viewing Pleasure
Hey everyone,
It’s been a long, crazy year. So crazy, in fact, that it looks like this is our first post of 2020 (in late December)!
Instead of a Year in Review, I instead posted a “thank you” video of sorts to our social media channels.
In addition to that, here is some MPSE content that I put together over the course of this year. I’ve been incredibly lucky to have a platform to interview some of the most creative, exceptional sound people in the sound community. I hope you’ll find these insightful and informative.
Riding the Waves of Commercials
The Sound of Aaron Hernandez’s Mind
Mr. Robot – Sound Advice event
Better Call Saul – Sound Advice event
Happy Holidays from the entire TA team!! We hope you and your family stay safe and healthy in these unprecedented times.
Sincerely,
Eric Marks
TA 2019 Year in Review
This past year was by far our busiest yet!! It really opened our eyes to the many opportunities that come with growth and expansion.
We started 2019 by moving into new mix stages, now dubbed Apollo and Overlook. These new spaces are much larger, providing room for more clients at a time, as well as an ADR setup for recording actors. We also upgraded Overlook to have 5.1 monitoring, which is now available on both stages. We’ve gotten some great feedback from producers and directors alike about both stages!
Our team grew by two this year, with Josh Moore and Ryan Vaughan bringing their fantastic talents to our studio. You can check out their biographies on our About Us page. Their passion, creativity and dedication have been essential in lots of our TA mixes coming to fruition.
Another milestone for us was building out a reliable, tested 7.1 workflow for mixing. This has enabled us to scale up to the needs of virtually any size project, including Atmos or IMAX mixes.
Early in 2019, our team sound designed and mixed an entirely unique project called the Jeep Brand Champion of Adventure Experience. Dubbed a ‘shared VR experience,’ this 360 degree video played in a custom-built dome at the 2019 X Games in Aspen, Colorado. The experience aims to put you into the shoes of a Jeep driver speeding through exciting adventures in the wild. The film required extensive engine sound design for differing camera perspectives and speeds, including some slow motion moments, as well as detailed environments/terrains. Everything was designed from scratch for this 5.1 mix as there wasn’t much usable audio captured on set. Here’s a recap video that gives a taste of what the experience was like.
In February, Eric mixed a new feature documentary film entitled Vas y Coupe. This beautiful, intimate film puts audiences into the shoes of seasonal workers on a Champagne Region vineyard in France. The recording environments in this film were fairly challenging, often with people distant from camera in reverby spaces. The soundscape was also pretty delicate – a scene could sound unnaturally dreamy, but adding simple foley of people picking grapes from vines would suddenly ground a scene in reality, helping us completely relate to the struggles of the characters. The film recently made its world debut at DOC NYC!
Meanwhile in Prague… Ben Hansford was directing a live action E3 commercial for The Elder Scrolls: Legends. This immersive, engrossing trailer was not only incredibly imaginative, but it also provided ample opportunities for gigantic, varied creature design! We got to build out the sounds of a huge medieval tavern, a giant grab falling through wood stairs, and a dragon breathing fire down a city street. Fun fact – Eric and Ryan recorded themselves speaking as various tavern patrons, which you can hear throughout the commercial. We had such a great time building out the world of this trailer with Ben and Hammer Creative.
Next, we took on our second Netflix project, Enter the Anime. This feature film had it all – natural sounds from the streets of Tokyo, anime-inspired sound design and TONS of visual glitches. To that end, Josh Moore built an entire library of glitch SFX specifically for the film. You can read all about his process in his blog post from earlier in the year. Additionally, we had to edit, sound design, and mix the entire film in a week! By successfully achieving this, we proved just how fast we could turn projects around when necessary, even while pushing creative boundaries.
Nothing energizes sound folks quite like music-driven films. Eric had the distinct pleasure of mixing a feature documentary titled Brian Wilson: Long Promised Road. This inspiring, personal journey through Brian’s life (including his days in the Beach Boys) is an unbelievable story. In spite of facing many challenges in his life, Brian has been one of the most transformative musical voices of the 20th century, and it was our job to help convey this through the sound of the film. There were many driving sequences where Brian is riding through his old Los Angeles neighborhoods, however he didn’t wear a lav microphone in the film. We had to remove as much car noise from these recordings as possible without destroying his dialog in the process. Additionally, Supervising Sound Editor Joshua Paul Johnson cleaned interview audio from over 55 years of material. He created a unique musical experience that seamlessly and subconsciously takes us through his entire life. We cannot wait to share this film when it’s ultimately released!
Next, we worked with Amazon Prime and Concrete Media on an original feature called LOL Surprise! Winter Disco. This lively, funny and inventive film combines live action scenes with stop motion animation, resulting in a vibrant film that’s bursting with sound. The live action scenes were shot on a stage, but needed to sound like we were in a house that was completely snowed in by a storm. The animation sequences needed complete sound treatment to bring them into reality – we carefully added every footstep, dog bark, car maneuver and firefly buzzing to help bring these scenes to life. The film culminates in a series of musical performances and dance numbers that were especially fun to mix.
In the fall we took on our biggest Disney project yet, a new show called Shook. This Disney Channel series follows Mia, an aspiring dancer who must rise above her circumstances to fully embody her true passion. We built the soundscape from scratch for this show as well, including backgrounds for Mia’s home, high school hallways, gymnasiums, dance studios and more. Many dance sequences for the show needed careful foley for every footstep, and also dynamic musical mixes to excite the audience. You can watch the entire series on Youtube and Disney Channel!
Perhaps nothing is more inspirational for any sound team than the sonic world of Star Wars. Ben Burtt opened our collective minds and our ears to a galaxy of possibilities over 42 years ago. We aimed to carry on this tradition while working on a feature documentary film called Built by Jedi: The Making of Star Wars: Jedi Fallen Order. This extended peek into the process of creating a AAA Star Wars game provided some distinct challenges. The production crew behind this film shot at Respawn Entertainment without a dedicated sound person (or ideal microphone setup) for the numerous recording environments, and, like many documentaries, this film is quite dialog focused. We spent a lot of time repairing off-mic and noisy recordings to help bring everything up to professional standards, and we hope the results speak for themselves. This film is on the Deluxe Edition disc of the game.
Eric’s epic finale to the year came in supervising and mixing a new Vudu feature film called Adventure Force 5. This original, fantastical film follows a group of kids as their quiet beach town is taken over by mysterious, violent aliens. This film likely had the most visual effects shots of any feature we’ve ever taken on! These VFX required comprehensive sound design for homemade weapons, alien drone vehicles, hover boots, and some gigantic action scenes. Sound designer Kevin Senzaki pulled out pretty much every trick in the book for this film, and on very tight schedule. Adventure Force 5 is also the very first original feature made for Vudu.
These are just a few highlights from 2019. We are so thankful to all our incredible clients – your vision and trust have elevated all of us as storytellers here at TA. Our imagination seems to be the only limit to what we can achieve together. Thanks to you, we’ve never felt more creatively fulfilled, and equally excited for the road ahead.
Here’s to another year of being transported through new stories, platforms and characters!
– Eric Marks
Creating a variety of Glitches
Hello everyone, this is Josh from the Transported Audio team! We recently wrapped a feature film for Netflix (it’ll be streaming next month!), and the project provided a unique opportunity for tons of glitchy sound effects. How, you might ask?
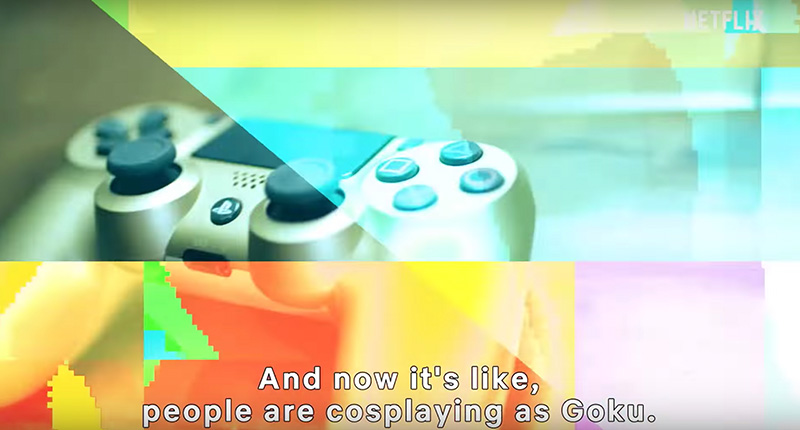
Here’s a screenshot from the film. Those color bars and 8-bit looking shapes aren’t small happy accidents – these are all rapidly animating, flickering overlays that are sprinkled throughout many sections of the film. There are literally hundreds of them! Not only that, but the visual style of these graphics changes based on the scene. These no doubt keep the film highly entertaining, and stylistic flair like this absolutely screams for creative sound design.
Being the sound designer for the film, it was ultimately up to me how best to approach the glitches. My goal was to keep our added glitches consistent over the entire film, and to introduce alternate layers to keep each scene sounding fresh. Instead of grabbing glitches from a sound library, I decided to create my own “glitch base” so that our effects would be unique to TA. From here I could utilize library glitches as an additional layer to add more variety to each instance of them. This project was on a tight turnaround time, so I needed a quick process to be able to cover large sections of the film with glitches quickly.
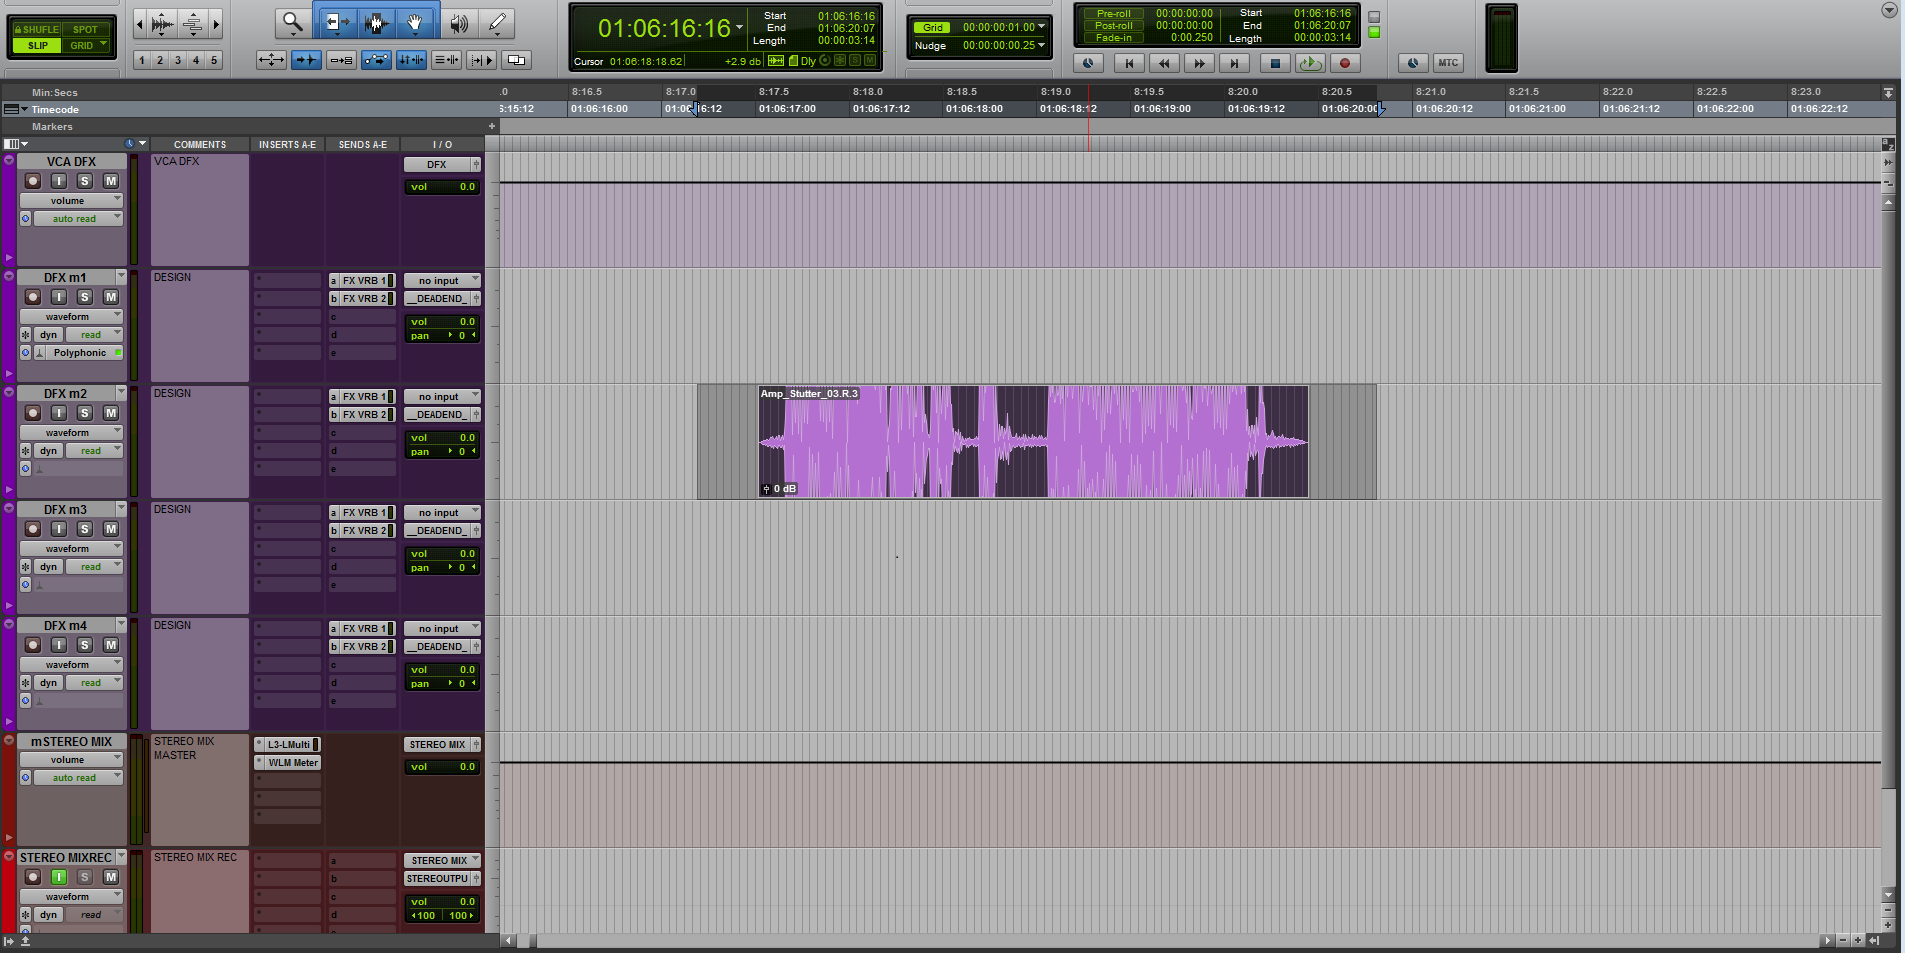
The base of the glitch sound is a fairly simple Amp Stutter. I wanted this effect to have variation, character, and cover a wide range of the frequency spectrum.
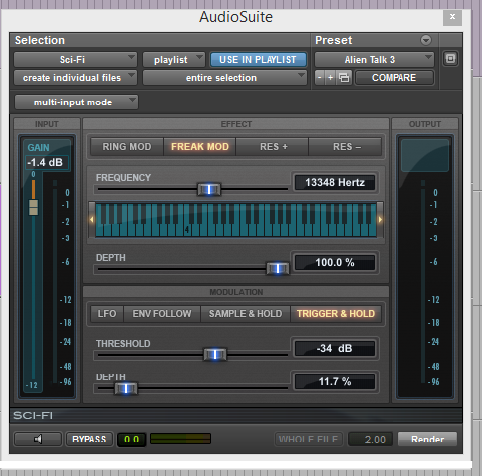
Once I’d built the amp stutter, I used the Sci-Fi plugin that comes with Pro Tools to add grit and grainy textures. I cycled through the factory presets to see what they sounded like. I really liked the preset Alien Talk 3.
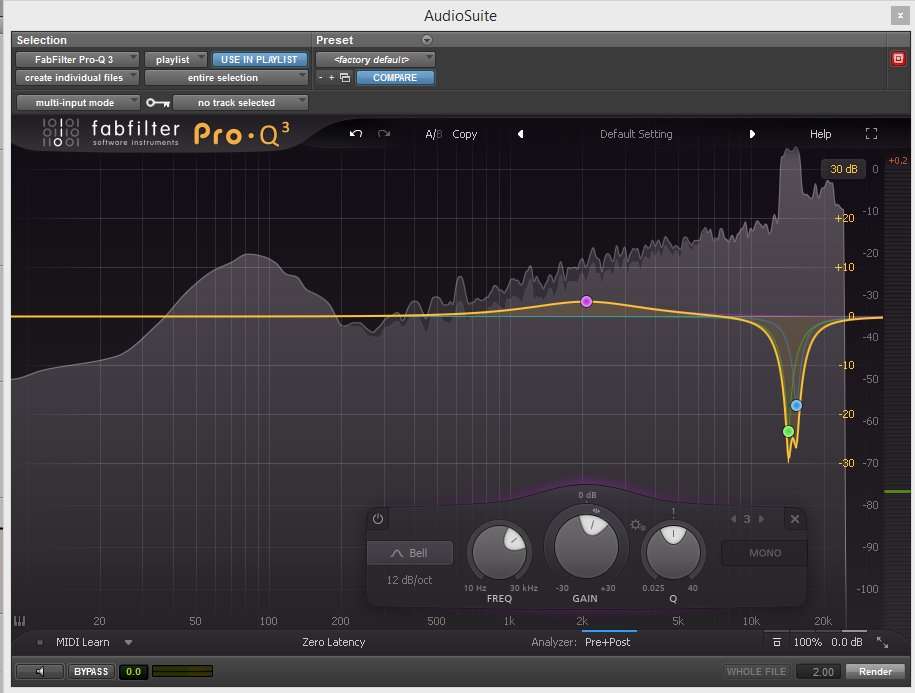
One thing I noticed upon adding the Sci-Fi plugin is that it introduced a bit of harshness to the higher frequencies. I notched this out using an EQ, and then boosted some of the mid-high frequencies to add a bit of clarity.
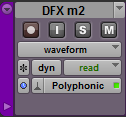
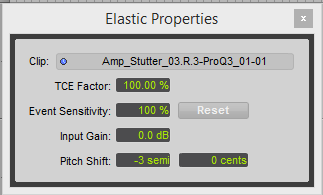
I then pitched the overall effect down to achieve a bit more beefiness. A quick way to do this is to change your tracks from elastic audio to polyphonic. Use the hotkey alt+5 to bring up the elastic properties box. Select your clip and enter how many semitones up or down you wish, hit enter and it will process the clip.
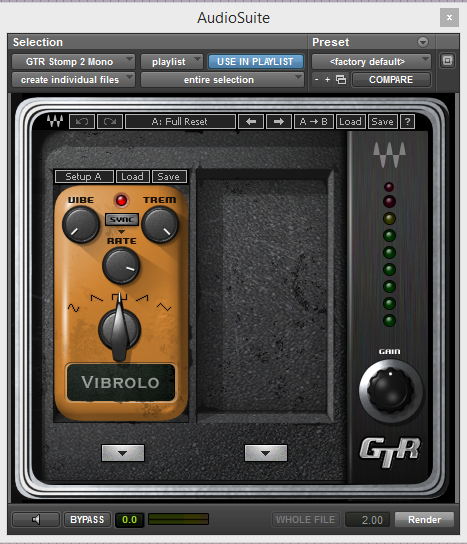
Now for the fun part! To create the glitchy sound quickly I used a tremolo. I used a square wave and set the tremolo so that the audio would completely cut out, creating that choppy glitch sound. For the rate/speed, I honestly went by feel. I processed the effect at different rates and played it back with picture to see if it fit the timing of on-screen glitches. This all helped to create our base layer, so from this point on it was all about creating variation in the design for each individual glitch.
After this I chopped up the effect and moved parts around to create some variation for the basic glitches.
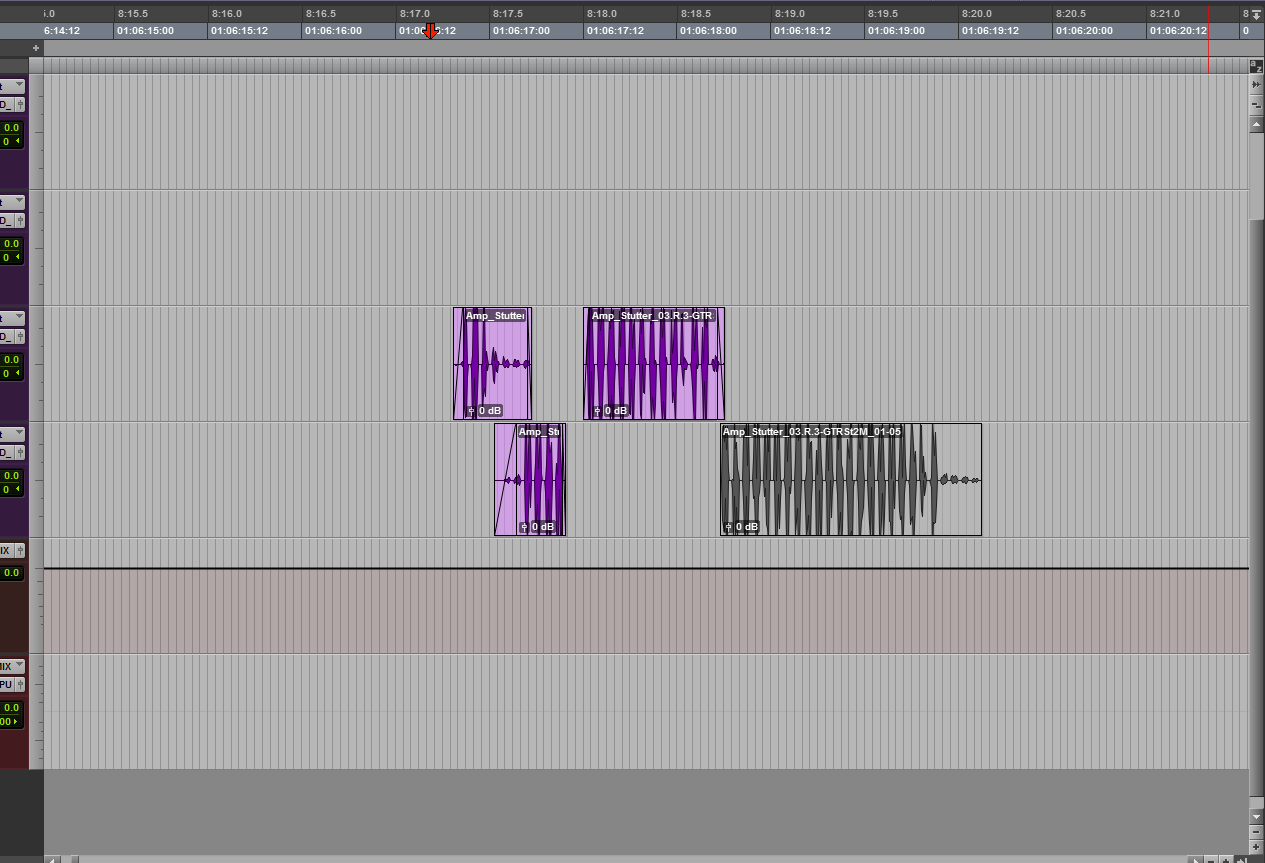
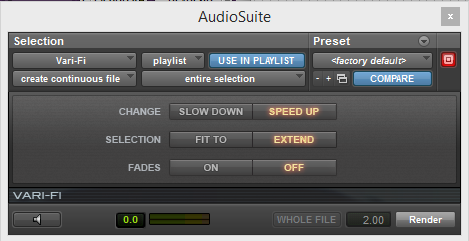
There are also glitch effects in the video that grow or shrink across the screen. For those I used Vari-Fi to speed up or slow down the glitches over time.
Now that we have the base effect, we can start layering glitches from a library. Below is a glitch from the finished project with layers.
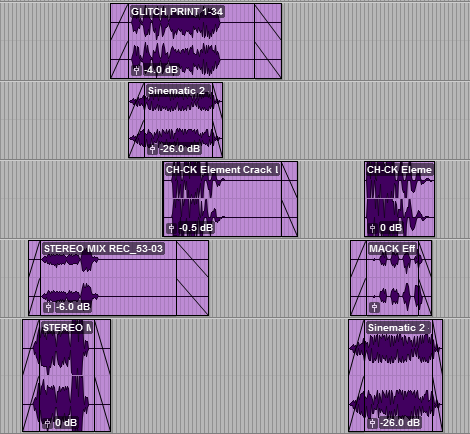
Looking back on it all, the process of creating a base layer for the glitch effects significantly sped up my design process and allowed me to spend more time being creative. I was able to create a decent amount of variation while maintaining consistency throughout the film by chopping up the base layer and arranging it in lots of different ways. Hopefully these glitches have added at least as much excitement to the film as the visual stutters and graphical glitches.
Thank you for reading!
– Josh
Creating the Voice for an Antique Robot
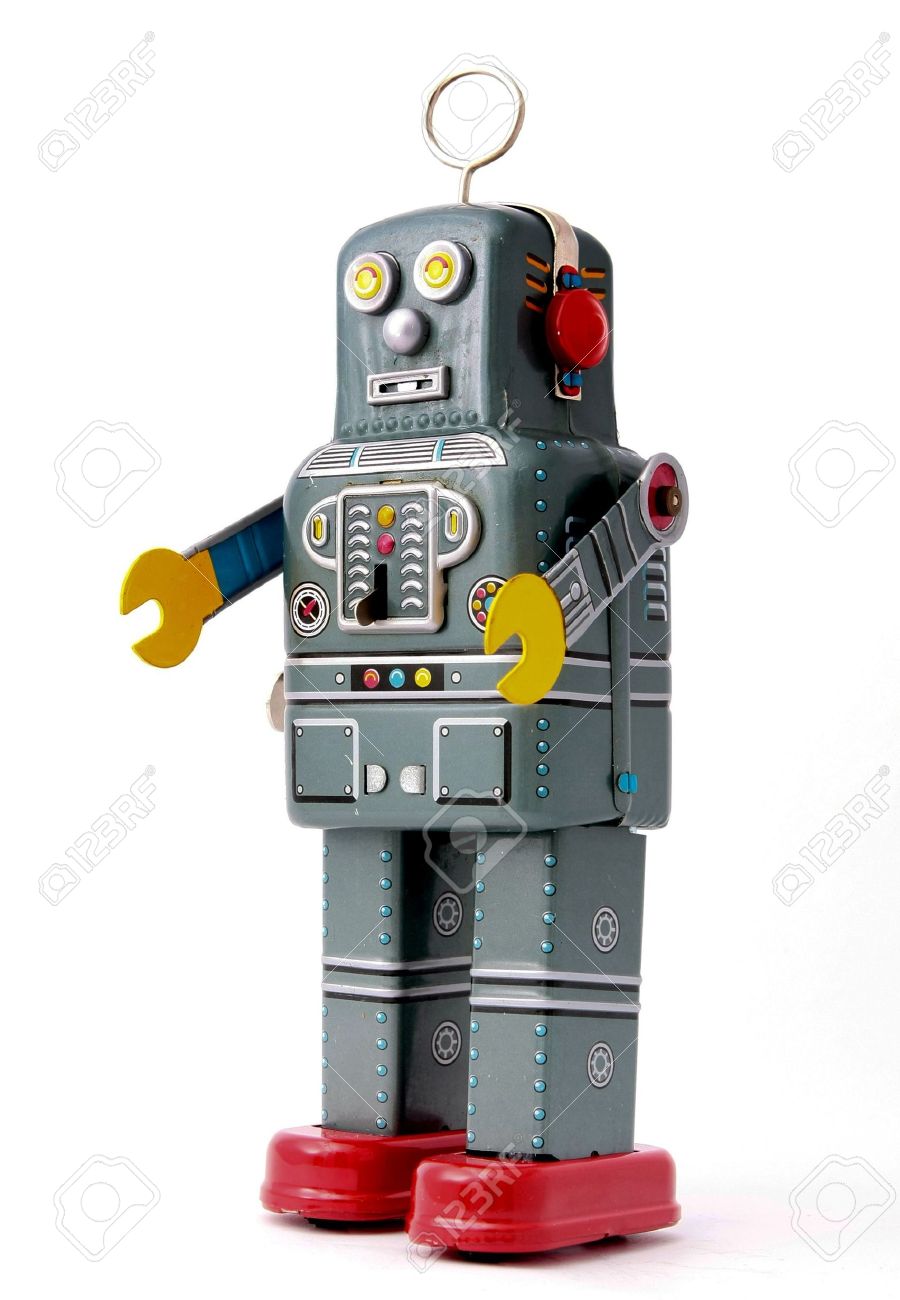
Hey this is Austin from the TA team. We’ve been working on a project that includes a unique robot character – let’s call him Mr. T. This blog post is about how we created Mr. T’s voice from scratch.
Mr. T is an older, mechanical robot. His character has a lot of heart and soul, and his best friend happens to be human. Mr. T doesn’t have an expressive face, so most of his communication is left to our sound team. Our core objectives were to find the character and timber of Mr. T’s voice, and then use it in specific and deliberate ways for every moment he should communicate verbally.
First, we played the project from beginning to end and begin considering Mr. T’s emotional arc. I created spot notes, paying close attention to context, asking myself questions like:
- What is going on in this scene around Mr. T?
- What are his expectations?
- How does another character’s motivations affect his emotional responses?
We sat down with my “Mr. T’s Emotional Response Spot Notes” document, started experimenting with my own voice into a microphone and hit record. I tried to follow my notes, but also reacted to other characters in the scene as if I was playing the role of Mr. T.
I tried to stay conscious of the actual sounds I was vocalizing. Mr. T knows how to say a few simple English words, but he definitely isn’t a chatty character. Most of what we recorded were just raw vocalizations like groans, “huhs”, “ums”, etc. I tried saying words like “ok” and “no”, which helped give us a little freedom to be even more emotionally deliberate. Once we had a lot of decent takes for each vocalized “line”, we began pulling “selects” to construct one single track containing all our favorite options.
At this stage, everything sounded like my raw voice babbling. The emotional intention was captured, but still pretty raw in terms of quality. Now it was time to shape these into a sonic profile for a small, old robot.
After finishing the recordings, we began playing with some granular textures using Native Instrument’s sampler, Kontakt. To do all this, we exported the recordings out of Pro Tools and brought them into Kontakt. Our plan with Kontakt was to stretch things out in order to deliberately introduce digital artifacts, and then squash things back down to make fit back into the proper timing.

In Kontakt, we set up a signal flow system so that we could hit record and just jam, allowing the original recordings to loop while tweaking parameters on the fly. Now we could freely experiment and remove any bad takes later on. The parameters we tweaked were time, pitch and grain size. These three parameters together influenced how stretched out something could be, and the sampler’s ability to smooth out artifacts. In order to deliberately introduce artifacts, we had to stretch things out pretty drastically. If things started sounding weird, I was encouraged!
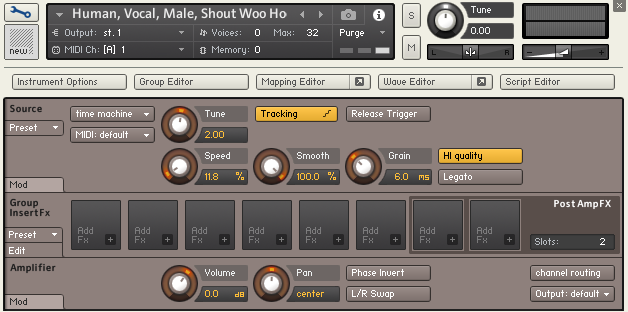
Once we had a nice collection of Kontakt recordings, I began shortening the stretched out recordings using pitch/time based AudioSuite plugins in Pro Tools. For some words or moments I’d do a little extra pitching as well. It definitely lost its human quality by now – the digital artifacting helped to define its robotic details.
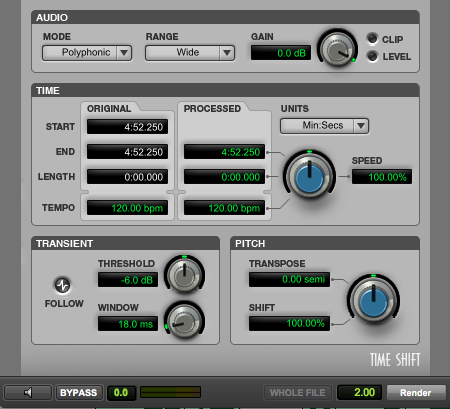
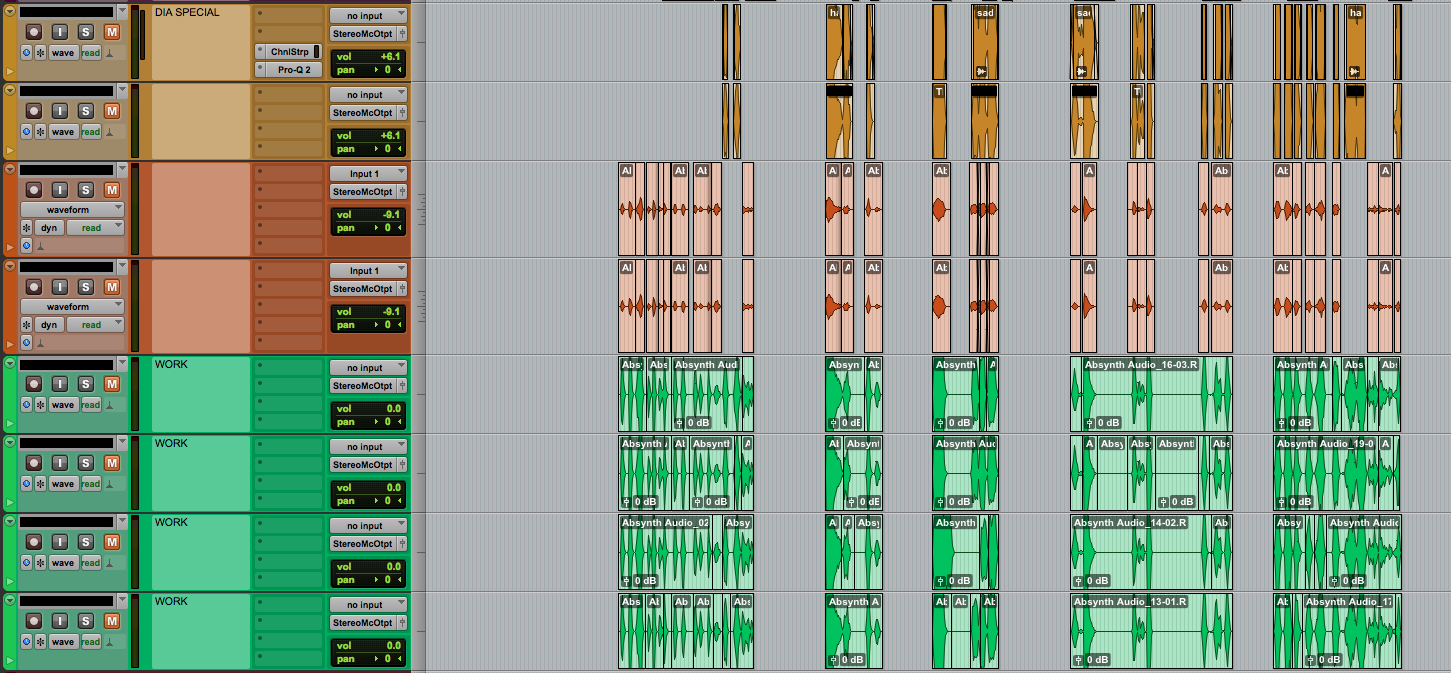
Our next step was to select and cut down the recordings, pick our favorite clips and time them to picture. We kept our eyes peeled for takes that were emotionally accurate, technically interesting and original. We also tried adding things like little stutter edits and repeated frames to further emphasize the robotic nature of Mr. T’s voice.
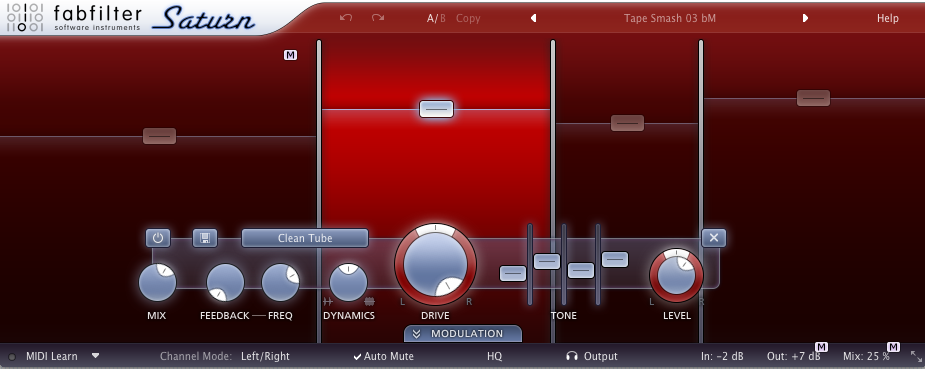
Another goal we had was to make these sounds feel like they were coming out of an old, small robot. The first place my mind went was to old, dinky guitar amps. This would make his voice sound like it’s coming from an imaginary, tiny speaker in Mr. T’s body. To achieve this, we boxed in and distorted Mr. T’s dialogue track. It’s easy to go overboard with an effect like this, so we tried to exercise restraint while using Fab Filter’s multiband distortion plugin, Saturn. Finally, we now have a set of vocalizations for Mr. T as an emotional character, which also incorporates aspects of his size and materials.
As we reflect back on this process, I think the most important factor was being as emotionally deliberate as possible in Mr. T’s performance. Deciding what he’s feeling, and finding the simplest way to convey it, was essential. The order of operations ended up being fairly simple: establish an emotional sound that’s relatable and easily understandable, then figure out how to separate it from humanity and stylize it to sound unique.
Sound design is a great medium for technical and creative expression, especially as storytellers. To be able to work on a project like this from a character and story-based intention, and then use unique technical processes to achieve it, required some finesse but absolutely paid off. Opportunities like this allow us sound people to flex all of our muscles.
We live for creative challenges like these!
TA 2018 Year in Review
2018 is already coming to a close!! This year really feels like it flew by for us. Let’s take a moment to step back and see all the exciting developments from the past year at our studio.
What a year it’s been for our team. We began 2018 mixing Season 3 of El Chapo on Netflix. It was quite the experience finding the creative signature of the show’s climactic 13 episode arc, with 40+ minute episodes giving us a full palette of characters and scenes. We cannot thank the sound editorial team at Bright & Guilty enough, as well as the Bad Idea, Univision and Netflix teams for this wonderful experience.
We also had the unique opportunity to mix episodes of several shows for Wham Network on Twitch! This is a super fun channel bubbling with fresh gaming lifestyle content. We even got to sound design all the show graphics and transitions, creating unique 8-bit audio signatures for the differing shows.
Next, we got to sound design and mix an incredibly creative futuristic film that included fist fights, magic and weapons. We can’t go into many details about the film until it’s released, but wow was this a fun one!!
As in previous years, we were able to design and mix many trailers for video game campaigns as well. Some of the highlights included full campaigns for Hitman 2 and The Elder Scrolls Online. We always have so much fun on these projects and love working with our partners at Dark Burn Creative.
We also had the great opportunity to work on lots of new videos with our collaborators at Muskrat Content, Red Bird Productions, Universe Creative and Working Nation. These included a variety of videos for Paramount, TV Land, Banner Health, The Gates Foundation as well as the ongoing “Do Something Awesome” campaign for Working Nation. We are so thankful to our many collaborators for all of these fun opportunities and more.
Our TA team expanded by one late this year!! Sound Editor Brandon Schuster is the newest member of our team, and he’s been a welcome addition both around the studio and on many of our projects. You can check out his full bio on the About page of this site.
There are lots of exciting developments coming up in 2019, starting right away with our move to bigger rooms on January 1st. These new rooms will be much more comfy and spacious, so please come on by for a tour to check them out! We’ll eventually post new studio pictures of them too.
Also, we have a brand new Transported Audio studio mascot!!! We won’t spoil the surprise, but be on the lookout on our social channels for a full reveal very soon.

